
How To Diagnose Engine Error Codes for your Honda Prelude
Diagnostic Codes Chart -- ECU Reset Procedure --
The following procedure is fairly simple and easy to follow. This will save everyone many hours of frustration and money if taken to a shop to tell you.
Step 1:
Locate the 2P Connector (Brown / Blue) found on the drivers side floor board by console
DO NOT JUMPER THE 3P CONNECTOR
Click Images To Enlarge

Step 2:
Make a Wire Jumper - Take a strand of copper wire and peel back shielding 1/4 inch on each side exposing the copper. Bend in a U shape. NOTE: You can also use a paper clip if you have to.

Click Images to Enlarge


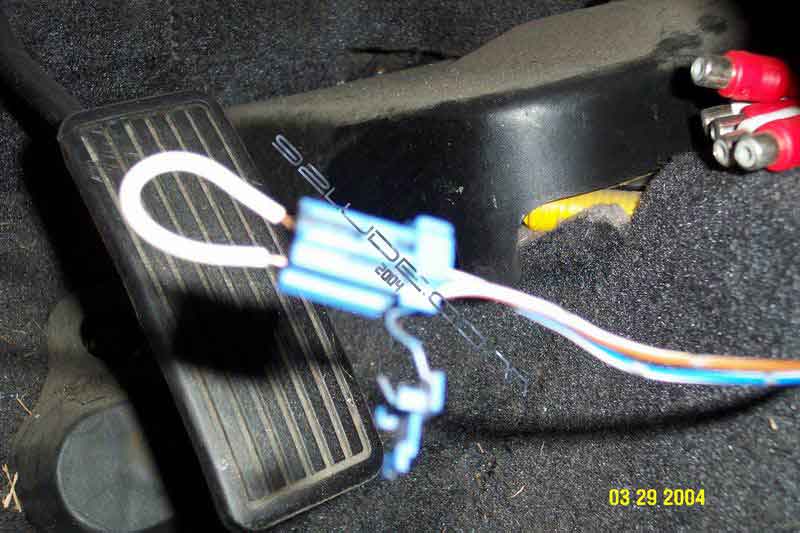
Step 3:
Insert Jumper into 2P Connector
Click Images to Enlarge
Step 4:
Turn the Ignition to the ON Position (Do Not Start)
Note the CODE: the Check Engine light indicates a failure code by the length and number of blinks. The Check Engine light can indicate simultaneous component problems by blinking separate codes, one after another. Problem codes 1 through 9 are indicated by individual short blinks. Problem codes 10 through 43 are indicated by a series of long and short blinks. The number of long blinks equals the first digit, the number of short blinks equals the second digit.
Go Here for Engine Code Chart
NOTE: Always remove the jumper wire when finished. If the service connector is jumped, the Check Engine light will stay on.

Step 5:
Do The ECU Reset Procedure.
Step 6:
Set the Radio Preset Stations and Clock.
These codes and page references pertain to the Helm Service Manual. You can obtain a Helm manual from Helm Inc.